Chocolate, please! Delicious and easy chocolate sheet cake with Baileys

Now, I originally meant to lead into this post with the words “who doesn’t love chocolate?”, obviously meant as a totally rhetorical question, but then I remembered that I actually have a colleague who DOES NOT LIKE CHOCOLATE. Yeah, I’m still just as baffled as you probably are right now! In our cantine, we get cake every Wednesday (gotta love Denmark!), and more often than not, he has to pass because it’s chocolate cake, or there are chocolate chips, or it has a chocolate glaze. So he probably wouldn’t appreciate this cake very much.

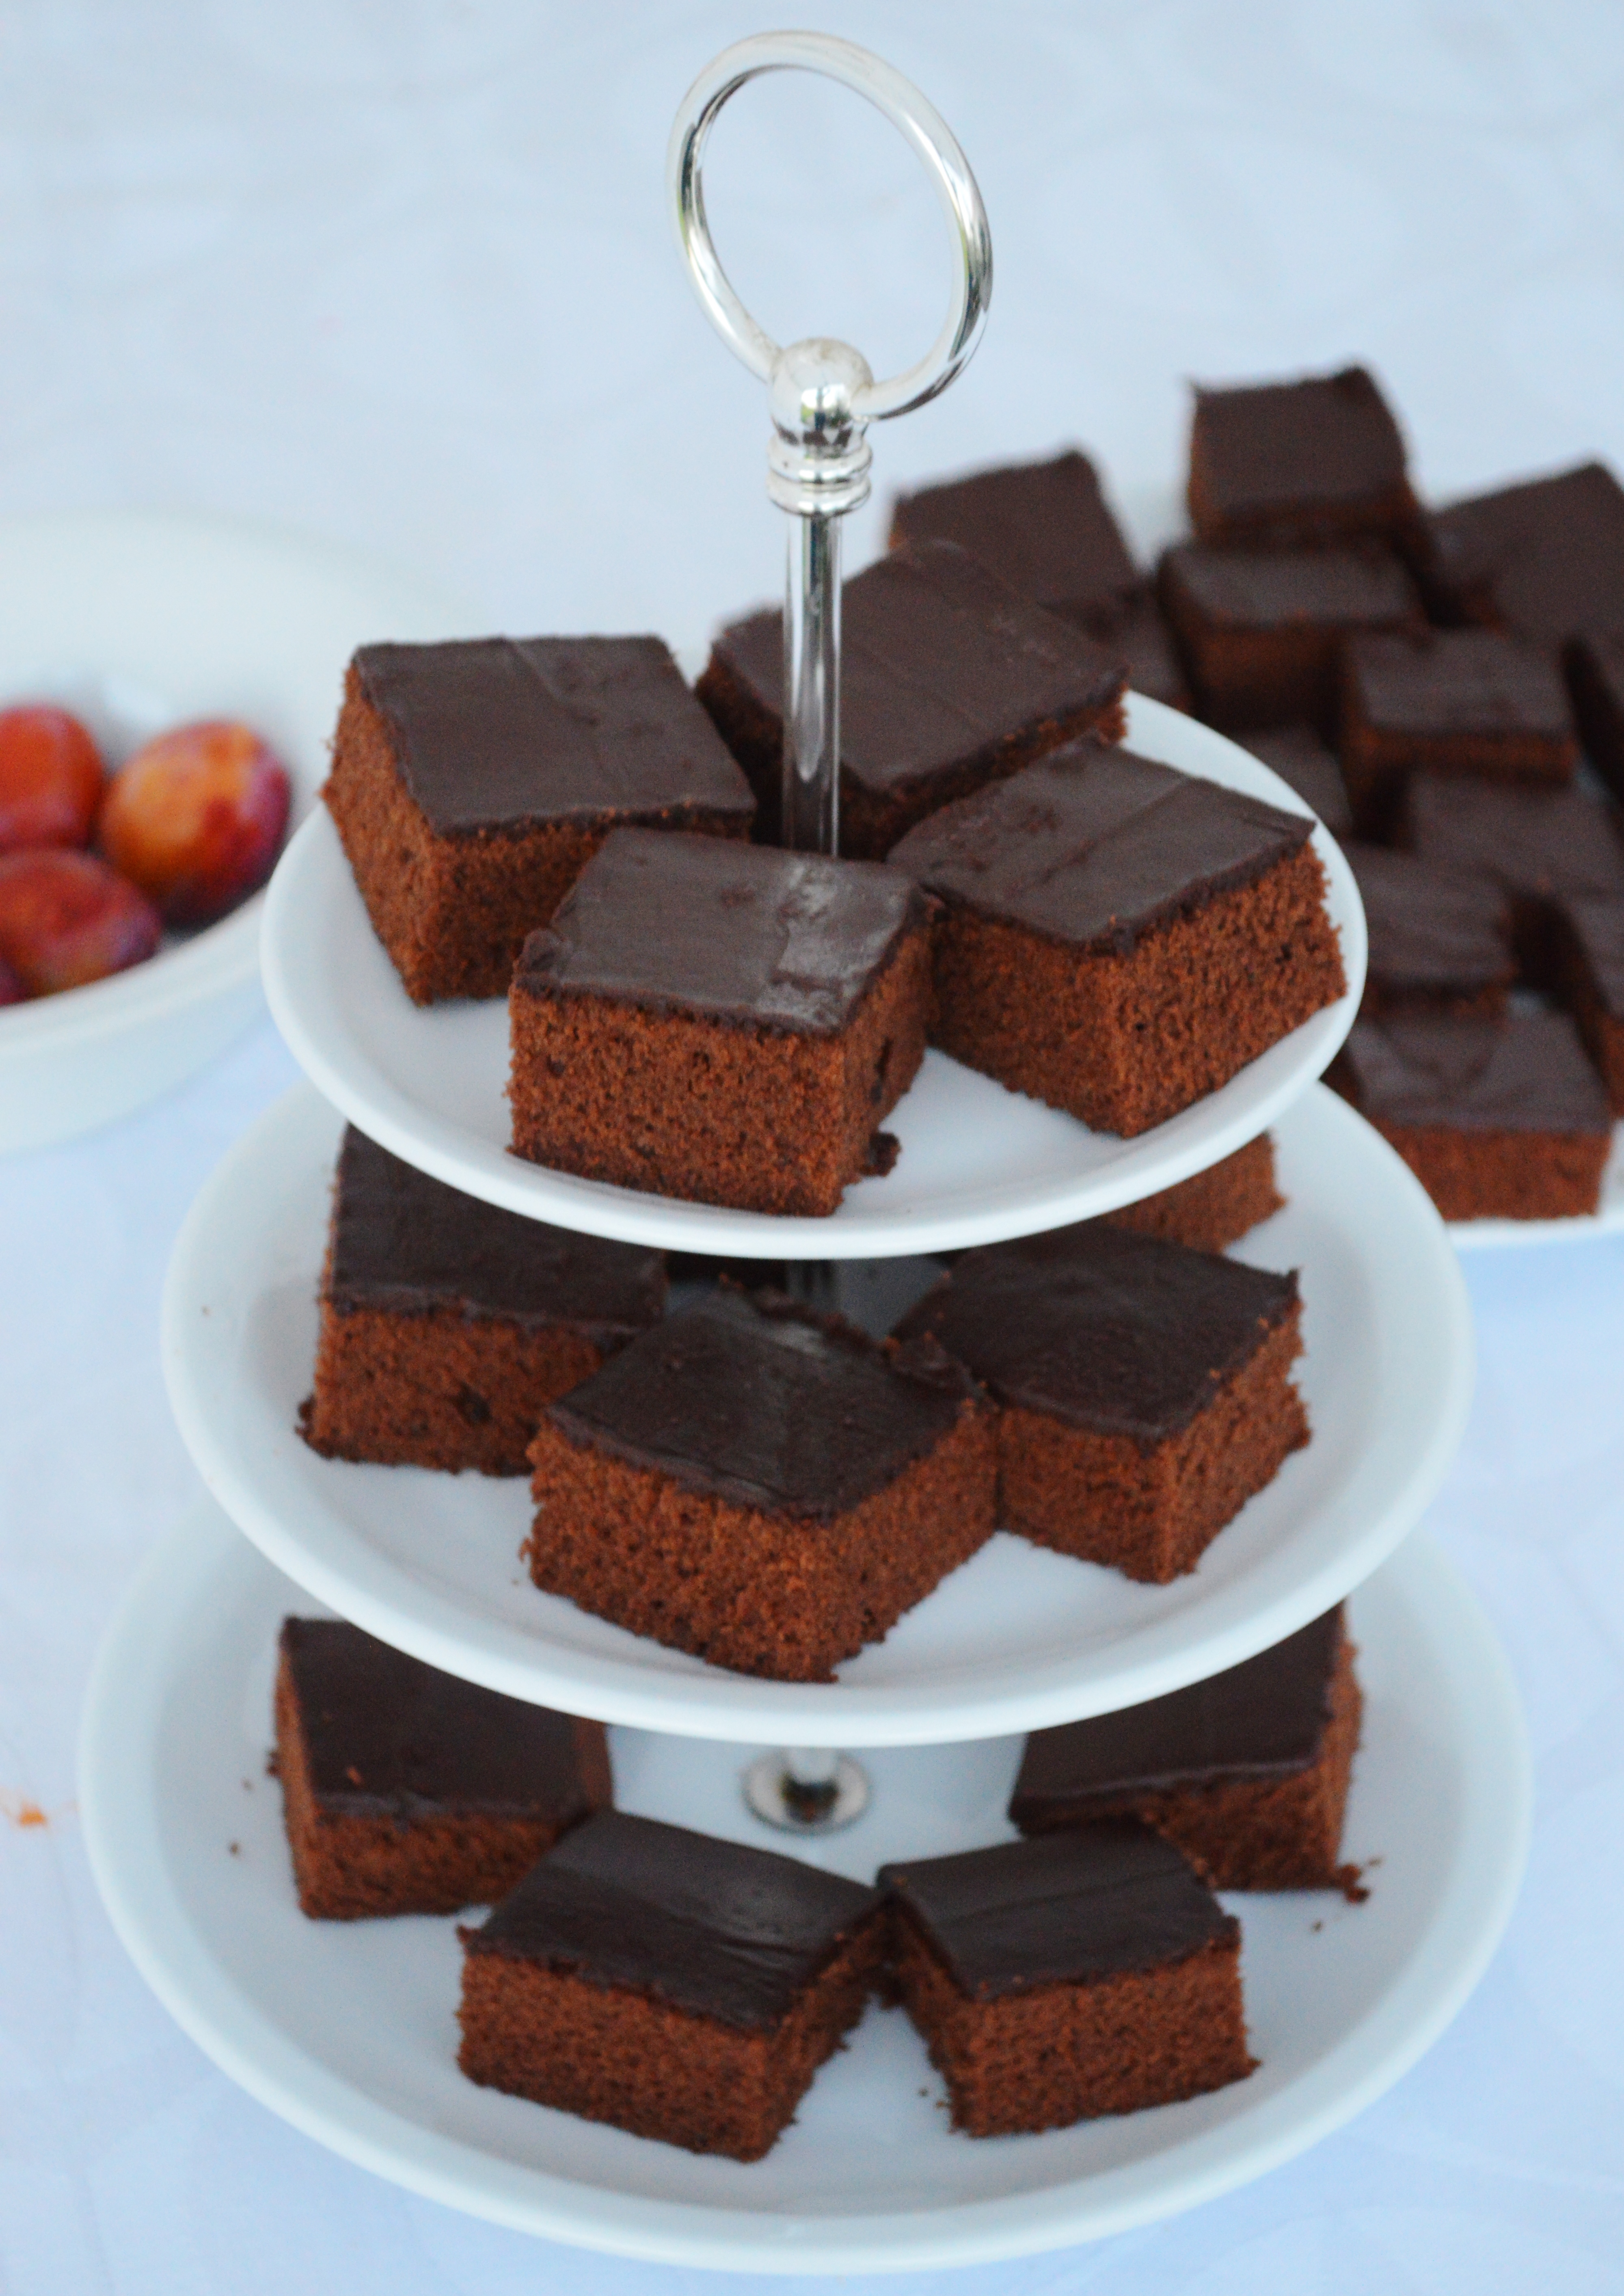
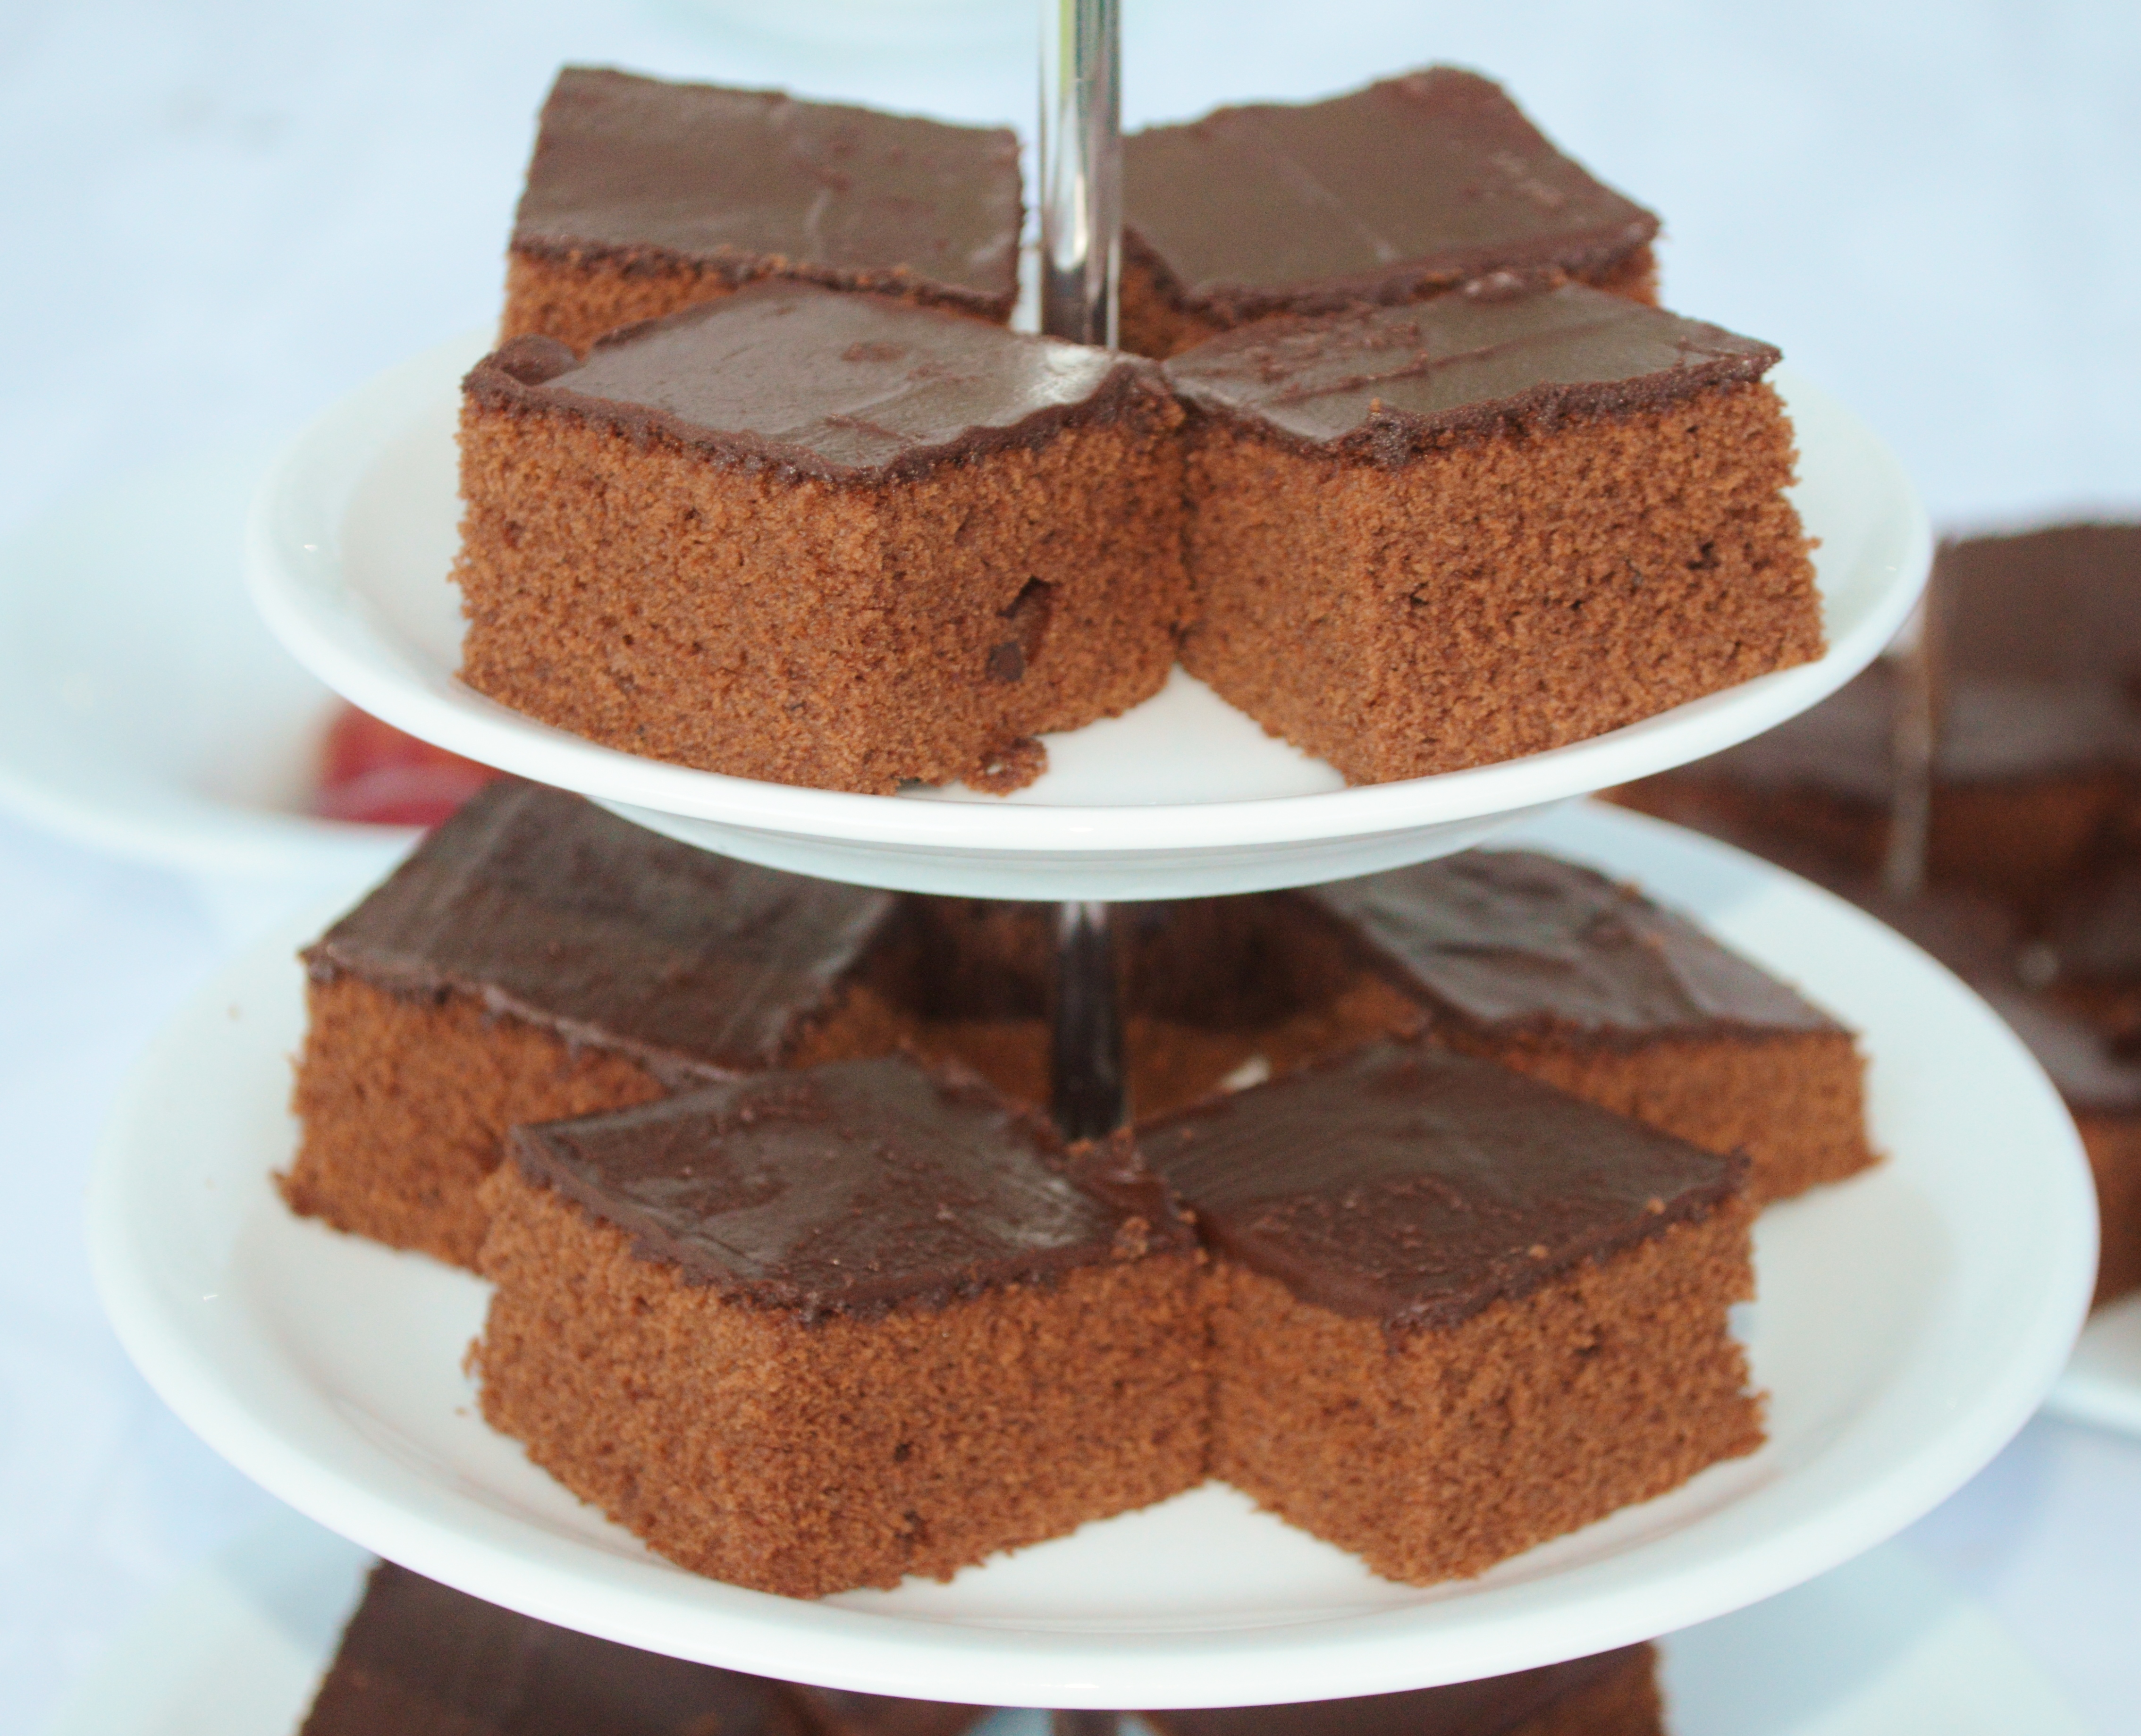
But you and me, on the other hand, are part of the estimated 99.99% of mankind who actually DO like chocolate - how could you not? It’s so amazing and versatile! This time, I tried my hand at a classic for a the birthday garden party I showed you last Sunday. I’ve had a bottle of chocolate Baileys sitting in my shelf for a couple of months now, and it was begging for attention. So I whipped up this beauty of a cake, and I have to say, I love how fluffy it turned out! It’s also quite open for variations: instead of Chocolate Baileys, you could of course also use the regular kind, or substitute it with brewed coffee. Or coconut milk, and add some shredded coconut. Or chopped almonds…

But here’s the version I made, which turned out double-yum! For the coating, I used dark chocolate, which I melted with 3 tbsp. of the Baileys. I had sent my boyfriend to do the shopping, and he didn’t know the difference between normal chocolate and the special coating chocolate (which melts more easily), so I ended up with a rather creamy mixture, closer to a ganache than a coating, but I managed to spread it nicely, and the taste was great.

chocolatebaileys2

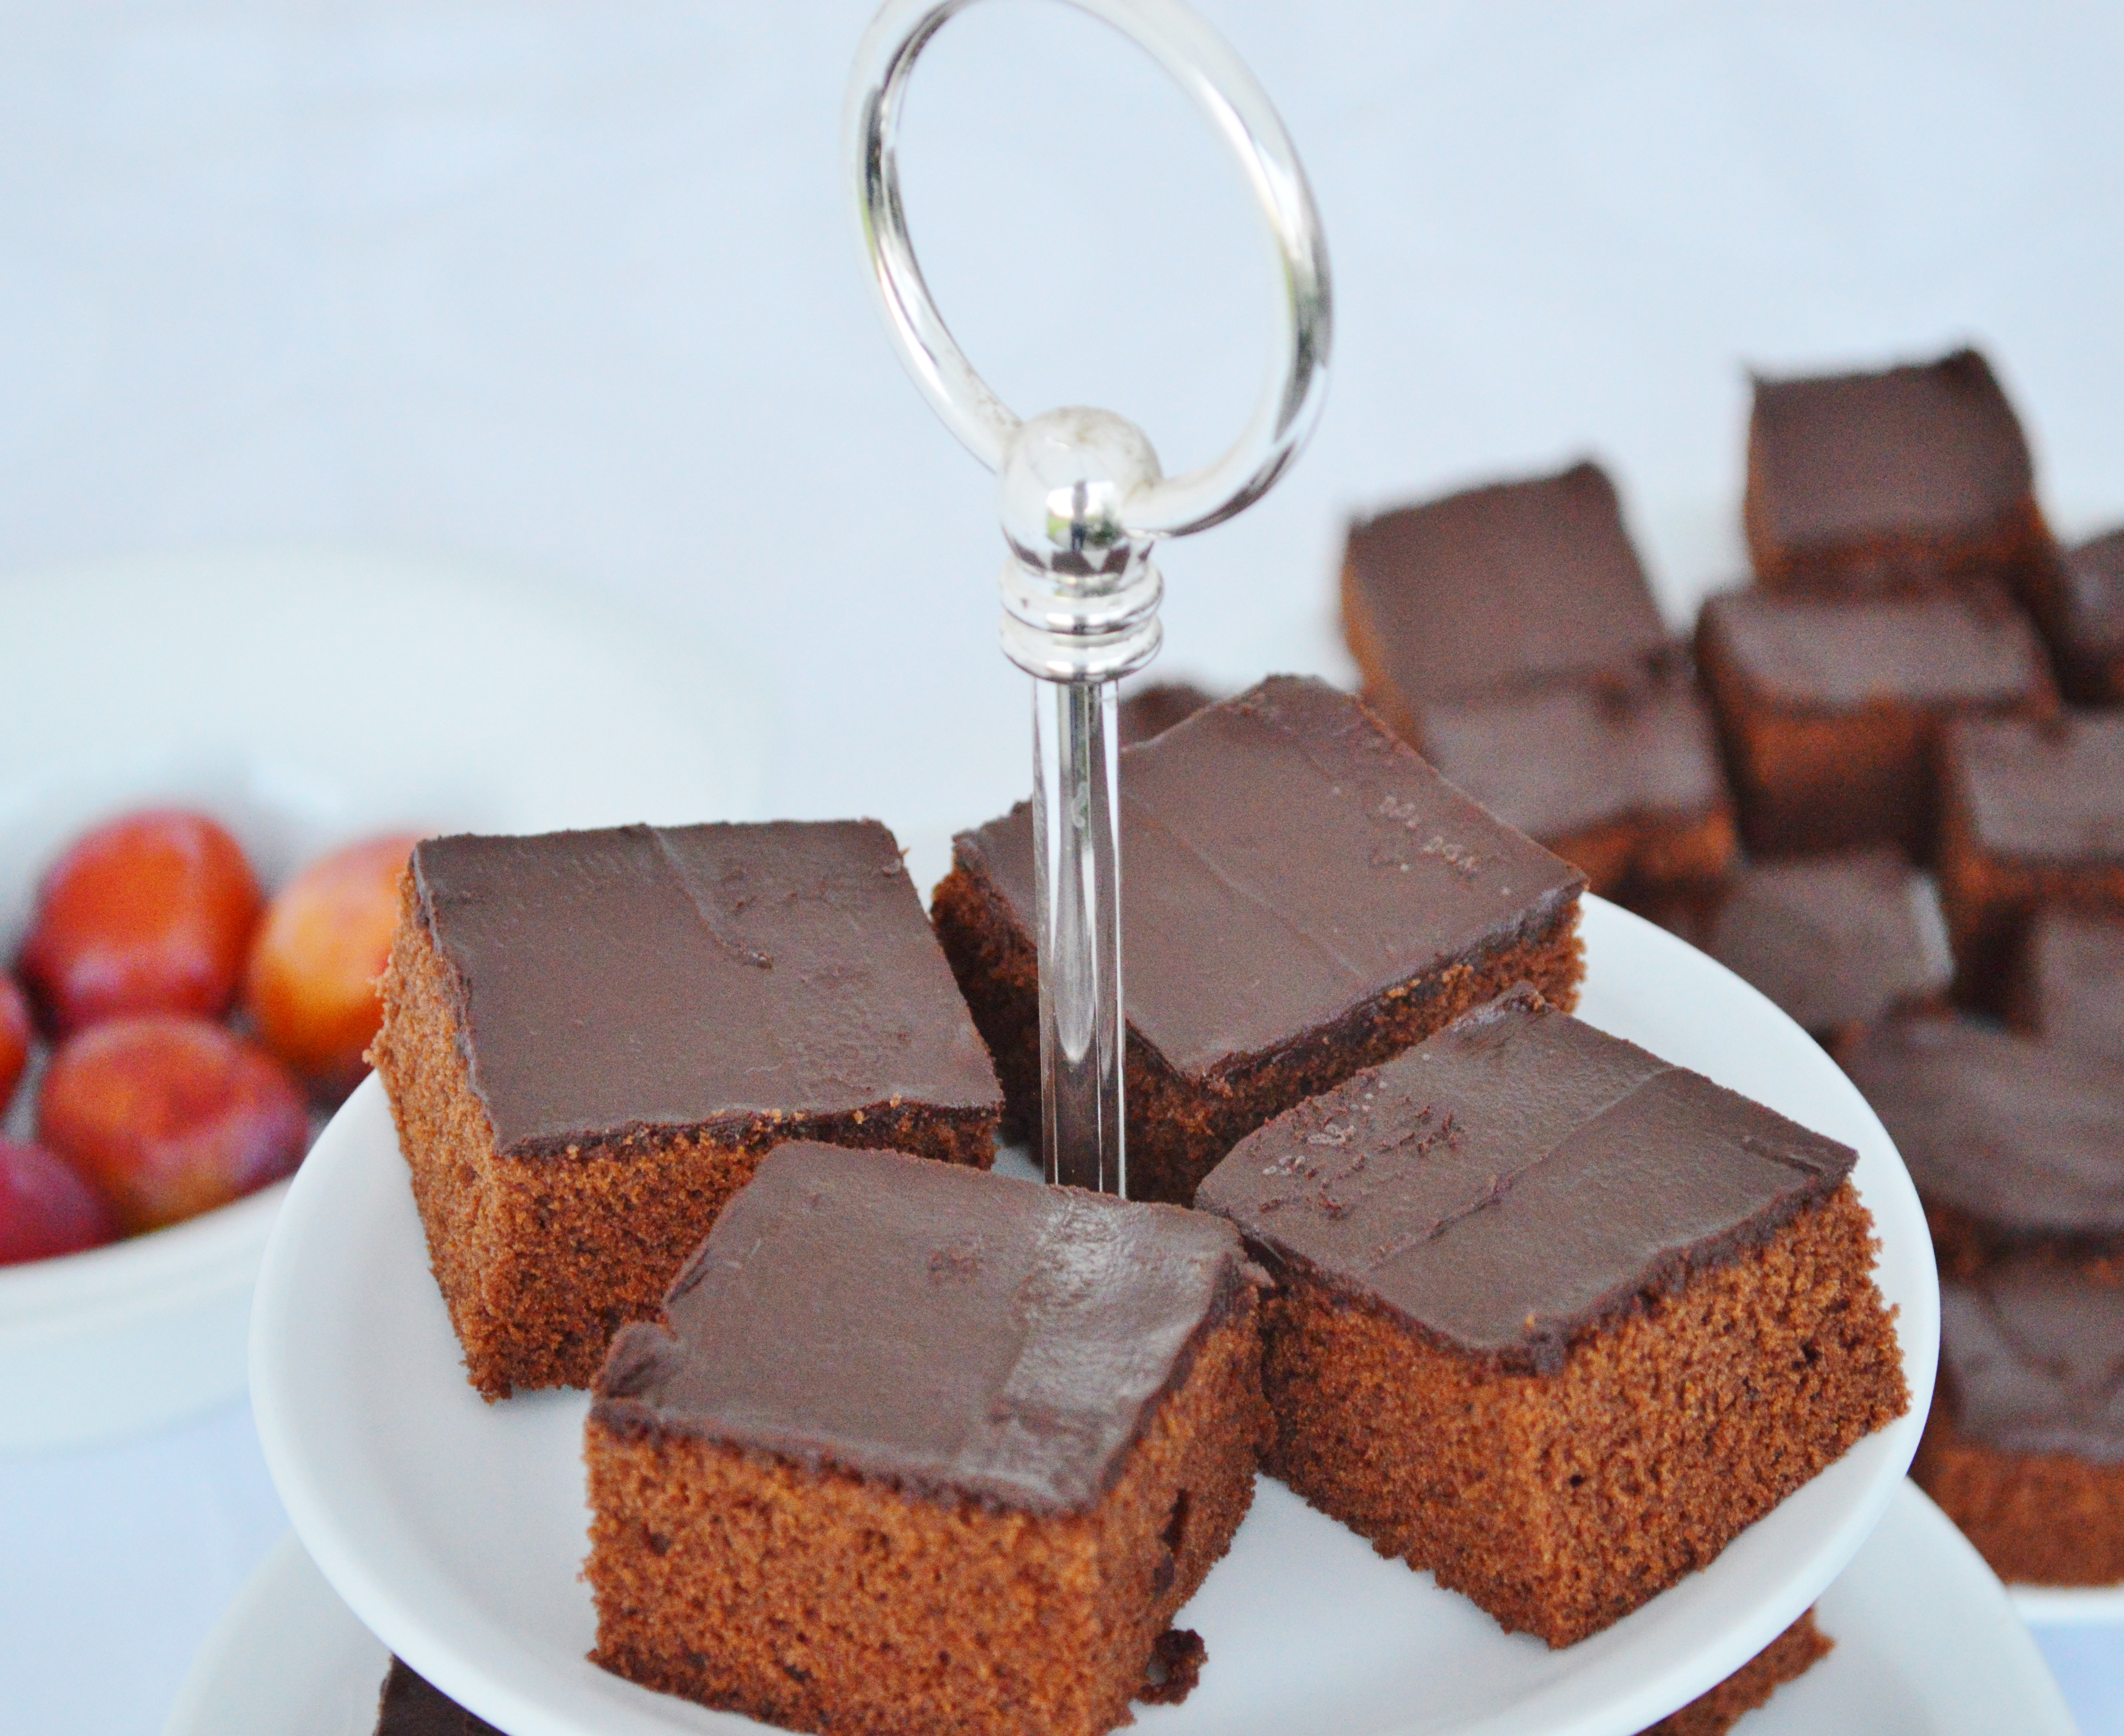
Chocolate sheet cake with Baileys

(yields one large baking sheet)

250g butter, softened

250g granulated sugar

375g all-purpose flour

50g dark cocoa powder

5 eggs

2 tsp. baking powder

1 tsp. vanilla sugar

350ml Baileys Chocolat Luxe

For the coating/ glaze:

200g dark chocolate

3 tbsp. Baileys Chocolat Luxe

Pre-heat oven to 180 degrees celsius. Line a large baking sheet with baking paper. Cut butter into small pieces. Add all ingredients, apart from the flour, into a big bowl and mix together, using a kitchen machine. When combined, add the flour and keep mixing until you have a smooth consistency. The mix will be relatively thick. Pour onto the baking sheet and spread as evenly as possible (it will get more runny in the oven and then even out more on its own). Bake for 20min, until a wooden stick inserted in the middle comes out clean. Let the cake cool off, then melt the chocolate for the coating together with the Baileys, and glaze the cake evenly. Decorate with sprinkles, shredded coconut, chopped nuts,… if desired.

chocolatebaileys1

chocolatebaileys3

What you should make for dinner: Vermouth and thyme chicken

Don’t you know that feeling when you’re just hungry after work and don’t know what to make for dinner? It’s tempting to just order a pizza or other take-out, but really you’d like something good? Well, look no further. This is a recipe my mom once found somewhere and adapted it over the years, and it’s sooooo delicious! I’ve made this for guests, too, and people love it. Plus, it’s super simple to make! Just throw the ingredients together and pop it in the oven. It’s pan-fried chicken breasts in a creamy vermouth-tomato-sauce with thyme, but that was a bit too long to put in the title. Served over fresh tagliatelle, maybe with a green side salad - perfection.


DSC_0435

Vermouth cream chicken

(for 3-4 portions)

3-4 chicken breasts (500g)

1 can chopped tomatoes

125ml Noilly Prat or other dry vermouth (not the Martini brand, it’s too sweet!)

250ml cream (I used low-fat Rama Cremefine)

1-2 tsp. dried thyme

salt, pepper

Pre-heat the oven to 200 degrees celsius. Trim the chicken breasts and season with salt and pepper. Sear them in an oven-safe frying pan for 2-3 min on each side (they shouldn’t be cooked all the way through). Add the vermouth and the cream. Drain the chopped tomatoes in a strainer and stir them in. Add the thyme and transfer the pan into the oven. Bake for 35-40min. Serve over fresh tagliatelle.

DSC_0428

DSC_0433

DSC_0437

A weekend treat: Spicy chicken burgers with avocado crema

Confession: I love burgers. Yes, there’s that little voice inside my head saying “you know, salads are much healthier!” and “you probably shouldn’t order fries with that!” and “you’re going to regret that tomorrow!” but I will always, and that is ALWAYS!,  be up for a good burger! (and to you, little voice: YES I should order fries with that and NO the only way I’ll regret this decision is if the burger turns out to be un-yummy!)

There’s a number of great burger places in Copenhagen. Halifax, for instance, is the obvious answer, but I’ve also written about a great burger place in Vesterbro and, most recently, Café von Fressen in Frederiksberg. If you’re looking for a good burger in Copenhagen, chances are you won’t be disappointed.

But why not make a nice burger at home? If you’re looking for a slightly different recipe, here it is: A nice juicy patty of ground chicken with some chili and sharp red cheddar, topped off with a nice avocado crema - delicious! You can of course feel free to add any other toppings or condiments to the burger, for example I imaging that some crispy bacon would be AH-mazing!

burger 1

Spicy chicken burgers with avocado crema

(for 4 persons)

400g ground chicken

1 small red onion

50g grated red cheddar

1 egg

2 tbsp. bread crumbs

1 ripe avocado

2 tbsp. yoghurt or creme fraiche

4 burger buns

salt, pepper, chili powder, cumin

tomato and cucumber slices

if desired, other condiments (e.g. ketchup, mustard)

if desired, other ingredients (e.g. bacon)

Chop the onion into small cubes. Mix with ground chicken and grated cheddar, add egg and breadcrumbs and season with salt, pepper and chili powder (you can also opt to finely hack a red chili and use that instead). Form four burger patties and grill or fry in a pan. Ensure that they are done all the way since it’s chicken!

Cut avocado into cubes and put into the blending container of a stick blender. Add the yoghurt or creme fraiche. Season with salt and cumin. Blend until smooth. (Side note: Avocado and cumin is possibly one of my favorite combinations ever. They just go together so well. If you haven’t tried it, do so immediately!)

Toast the burger buns and cut in half. Put a patty on each bottom bun, top off with the avocado crema, tomato and cucumber slices as desired. I also used a little bit of sweet mustard and some ketchup on mine (because I LOVE ketchup. I will put it on anyhting. Seriously. If it’s not dessert, I might just put ketchup on it. Don’t judge me!).

Ignore the little voice in your head and serve with fries or potato wedges. You’re having a chicken burger. That’s healthy!

Spicy chicken burger with avocado crema

Spicy chicken burger with avocado crema

Happy Easter, pt. 2: Easter cupcakes

It may be slightly delayed, but not too late, to share a great cupcake recipe. I made and decorated these for Easter, but they can easily be adapted to any other occasion/ holiday/ festivity or just prepared for a lazy Sunday afternoon. Here it goes:

foto 1 (13) (1)

“White delight”  muffins

for the plain muffins (12):

100g white chocolate

150ml milk

50g shredded coconut

200g flour

2 tbsp. baking powder

2 eggs

100g sugar

80ml sunflower seed oil

12 small chocolate eggs

for the decoration:

cupcake topping, chocolate for glazing, sprinkles, etc.

Chop the white chocolate into small pieces and heat in the milk. Stir frequently until the chocolate is melted, but avoid the milk getting to a boil. Mix the dry ingredients (flour, baking powder and coconut). In another bowl, beat the eggs, sugar and oil and mix in the chocolate milk. Quickly work in the dry ingredients. Line a muffin tin with paper forms and fill about 1 spoonful of dough into each. Put a small chocolate Easter egg in each form and distribute the remaining dough on top. (Note: this is not a must for the recipe, I just wanted to have a nice little Easter surprise)  Bake at 175 degrees (Celsius) for about 25min.

I made two batches of these and decorated half with a cupcake topping (admittedly, I bought a mix), to which I added green food coloring, and made small Easter nests with sugar eggs. The other half I glazed with white chocolate and added green sprinkles and some edible wafer flowers.

Hiding the chocolate eggs

Hiding the chocolate eggs

Ready for decorating

Ready for decorating

Easter cupcakes 1: Easter nests

Easter cupcakes 1: Easter nests

Easter cupcakes 2: Flowers

Easter cupcakes 2: Flowers

Happy Easter: Homemade exotic spring jam

It’s Easter and that means a looooong weekend - 5 days without work, whoopee!! And the weather couldn’t be more perfect; sun, only the occasional breeze instead of the usual storm-like winds, and temperatures above 15 degrees. Amazing! How could anyone not be in a spring mood?

With all that free time on my hands, and inspired by the beautiful weather, I decided it was time to make something again! A nice give-away/ gift for the hosts for the family Easter brunch we’re attending tomorrow. So I decided on a nice jam. My first thought was strawberry-rhubarb (since I still have some rhubarb in the freezer), but I’d rather use fresh rhubarb when it is in season. So I decided on an exotic spring jam with mango, pineapple and kiwi, which turned out quite yummy!

Recipes for jam aren’t usually very complicated, since you just mix fruit with the necessary amount of jelly/ jam sugar. In Germany, they have 1:1, 2:1 and 3:1 sugars, which basically means you use 1, 2 or 3 parts fruit and 1 part sugar. In Denmark, I’ve only found one type of “syltesukker“, and you can either use it 1:1 (i.e. 1 kg of fruit and 1kg of sugar), or you make the low-sugar version with 1kg of fruit and 500g of sugar (which I usually do, it turns out sweet enough and the gelation works just as well.

So here’s my recipe for this lovely, exotic and fruity jam:

Exotic spring jam

(makes ca. 5 small-medium glasses)

300g mango

300g pineapple

400g kiwi

50ml fruit juice

3 tsp. rum

500g jelly sugar

foto 3 (7)

Peel the fruit and cut into small pieces. My kiwis were not overly ripe and therefore still a bit sour, which worked out well to even out the sweetness of the mango and sugar. If you use very ripe and sweet kiwis, maybe add some lemon or lime juice.

foto 4 (5)

Add some water or fruit juice (I used a “tropical” juice mix) and 3 tablespoons of rum. Add the sugar and bring to a boil. Let simmer for 10-15min, stirring frequently.

foto 2 (7)

Take off the heat and blend with a stick blender. Bring to a boil again and let simmer for another minute or two. Then take off the heat and fill into prepared glasses. Put lids on tightly and turn upside down for 5mins. The turn back around and let the jam cool off completely. Store in the fridge (especially after opened). Enjoy!

foto 1 (7)