Happy Easter: Homemade exotic spring jam

It’s Easter and that means a looooong weekend - 5 days without work, whoopee!! And the weather couldn’t be more perfect; sun, only the occasional breeze instead of the usual storm-like winds, and temperatures above 15 degrees. Amazing! How could anyone not be in a spring mood?

With all that free time on my hands, and inspired by the beautiful weather, I decided it was time to make something again! A nice give-away/ gift for the hosts for the family Easter brunch we’re attending tomorrow. So I decided on a nice jam. My first thought was strawberry-rhubarb (since I still have some rhubarb in the freezer), but I’d rather use fresh rhubarb when it is in season. So I decided on an exotic spring jam with mango, pineapple and kiwi, which turned out quite yummy!

Recipes for jam aren’t usually very complicated, since you just mix fruit with the necessary amount of jelly/ jam sugar. In Germany, they have 1:1, 2:1 and 3:1 sugars, which basically means you use 1, 2 or 3 parts fruit and 1 part sugar. In Denmark, I’ve only found one type of “syltesukker“, and you can either use it 1:1 (i.e. 1 kg of fruit and 1kg of sugar), or you make the low-sugar version with 1kg of fruit and 500g of sugar (which I usually do, it turns out sweet enough and the gelation works just as well.

So here’s my recipe for this lovely, exotic and fruity jam:

Exotic spring jam

(makes ca. 5 small-medium glasses)

300g mango

300g pineapple

400g kiwi

50ml fruit juice

3 tsp. rum

500g jelly sugar

foto 3 (7)

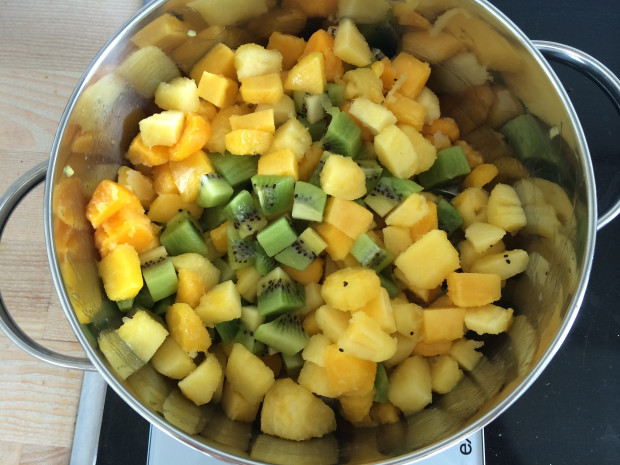
Peel the fruit and cut into small pieces. My kiwis were not overly ripe and therefore still a bit sour, which worked out well to even out the sweetness of the mango and sugar. If you use very ripe and sweet kiwis, maybe add some lemon or lime juice.

foto 4 (5)

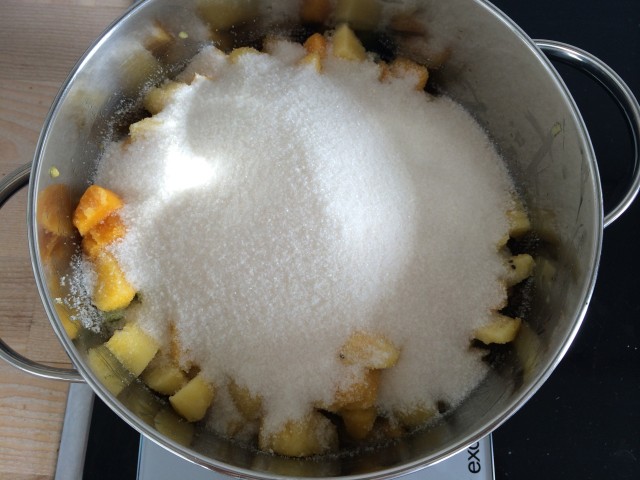
Add some water or fruit juice (I used a “tropical” juice mix) and 3 tablespoons of rum. Add the sugar and bring to a boil. Let simmer for 10-15min, stirring frequently.

foto 2 (7)

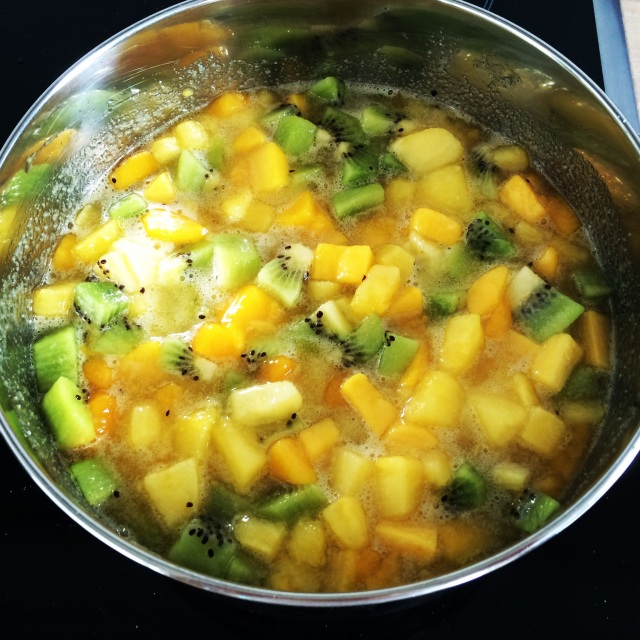
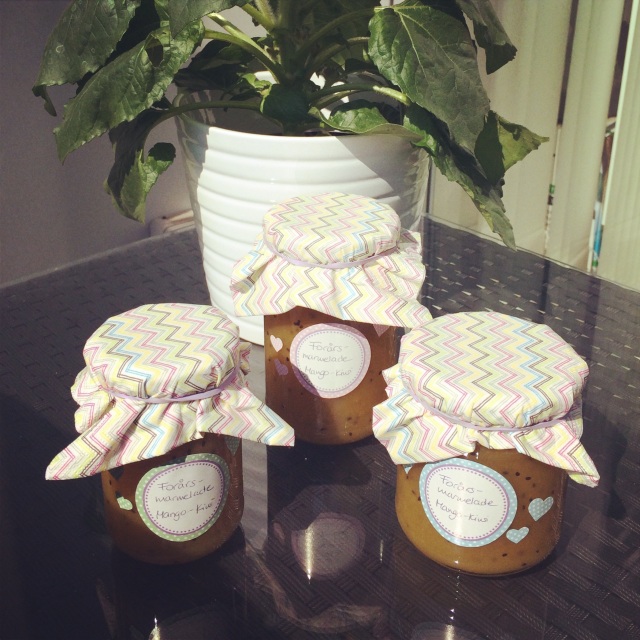
Take off the heat and blend with a stick blender. Bring to a boil again and let simmer for another minute or two. Then take off the heat and fill into prepared glasses. Put lids on tightly and turn upside down for 5mins. The turn back around and let the jam cool off completely. Store in the fridge (especially after opened). Enjoy!

foto 1 (7)

Yummy Denmark: Kanelsnegle

When I think back to the first couple of times I came to Denmark back in 2011 to visit the viking boyfriend, who at that time technically seen wasn’t even my boyfriend yet, I guess, but that’s a different story… where was I? Ah yes, the first couple of times I was in Denmark, there was something I associated with Denmark more than anything else (more than the flags everywhere, even more than hotdogs!), and that was the unmistakeable, soft smell of cinnamon that tickles your nose every time you walk past a 7Eleven store. I should explain that we didn’t have them back then in Germany (don’t think they do now), and they are virtually at every street corner in Copenhagen. Seriously, it is impossible to walk through Copenhagen for more than 10 minutes and NOT see a 7Eleven. That’s particularly practical for when you’re out partying and desperately craving a hotdog for “natmad” at 3am, but again, different story.

To this day, walking past a 7Eleven and catching that sweet cinnamon smell, it feels like I just came here for the first time. Ah, nostalgia…

Classic kanelsnegle with sugar glaze

Kanelsnegle, or cinnamon rolls, are a very popular Danish bakery good or dessert. You can buy them everywhere. Even the supermarkets with their fresh baked goods sections have all sorts of them. I think the very first kanelsnegle I had was probably either from a 7Eleven or from the Netto store across the street from the boyfriend’s apartment at that time.

The classic version has a sweet icing on top, as in the picture above, but you can find varieties with chocolate as well (chocolate and cinnamon - what’s not to love?).

Yum, look at all these delicious kanelsnegle at Lagkagehuset!

They are usually made with yeast dough - an English recipe can be found on this blog called My Danish Kitchen - as well as tons of butter, sugar and of course cinnamon.

So tonight, I was (a) craving something sweet for dessert and (b) wanting to bake something for my boyfriend to take to his grandma today when he goes to visit her in Jylland, but (c) feeling quite lazy, so instead of making a yeast dough myself, I resorted to buying pre-made puff pastry and making a batch of cute mini kanelsnegle.

separator

Quick and easy kanelsnegle

1 package of puff pastry (pre-made and rolled up)

ca. 125g unsalted butter, room temperature

2 tbsp. brown sugar

2 tbsp. cinnamon

1 egg

Roll out the pastry and spread with a thin layer of butter. Leave out about 2cm at a short end. Sprinkle on brown sugar and cinnamon evenly. Carefully roll up, put some water on the edge of the dough so it sticks together when the roll “closes”. Cut into approx. 1,5cm pieces and put on a baking sheet. Whisk up the egg with 1 tbsp water and brush over the tops of the snegle. Bake for about 15mins (or until golden brown) at 200°C. Take the snegle out of the oven and let them cool. For the glaze, mix about 4 tsp powdered sugar with about 1 tsp milk (be careful not to use too much milk, because the glaze should be nice and thick!) and brush generously over the snegle.

separator

Did they turn out as beautiful as the ones in the pictures above? No, they did not. In fact, some came up quite weird during baking. But they are adorable and cute, and they are SO delicious!! I’m honestly considering eating them all by myself right here and right now, and pretending I forgot that I promised to bake something for tomorrow…

WP_20140110_0042014011021123820140110211335

Result: adorable little kanelsnegle!

Bottom line, you should get yourself some kanelsnegle right now! Quickly, before the EU regulates them away - see here for one of the biggest news stories last fall. Or, even better, make your own cute mini snegle with the recipe above. Added bonus: you can put in as much cinnamon as you want PLUS your apartment will smell AMAZING.

Happy weekend!

Homemade Christmas gift idea: Cranberry syrup

Kochen und Backen sind ja schon seit längerem unter meinen Hobbies zu finden, aber in den letzten Monaten bin ich auch immer mehr unter die Selber-Macher gegangen. Marmeladen, Apfelmus, Chutneys, Pesto - und jetzt eben auch Sirup. Cranberries gehören in die Herbst- und Winterzeit wie Mandarinen und Walnüsse. Bereits zu Thanksgiving habe ich diesen Sirup hergestellt, um ihn im Apéritif zu verwenden (dazu einfach etwas Sirup mit Champagner, Sekt, Prosecco oder Weißwein aufgießen, eventuell mit einer halben Orangenscheibe garnieren). Er eignet sich aber ganz genauso hervorragend über Vanilleeis oder zu anderen Desserts, oder für die Zubereitung von Cocktails. In hübsche Flaschen abgefüllt macht er sich also ganz wunderbar unterm Weihnachtsbaum. Die Step-by-Step-Anleitung findet Ihr hier! separator

Cooking and baking have been some of my favorite things to do for quite a while now, but recently I’ve also begun making other things on my own, such as jam, apple sauce, chutneys, pesto etc. And then, for Thanksgiving, I decided to make a cranberry syrup to use in my welcome drink (it’s an adaptation of a Kir Royal: simply mix a bit of syrup with champagne, prosecco or white wine and garnish with an orange slice), but this syrup is also a great addition to vanilla ice cream or other desserts, or can be used in cocktails. Therefore, it’s a wonderful Christmas gift. You can find the step-by-step instructions below!

separator

Homemade Cranberry Syrup

WP_20131126_003[1]

Step 1

500g Cranberries, 250g Zucker und 300ml Wasser in einen großen Topf geben und zum Kochen bringen.

In a large pot, combine 1 pound of cranberries, 250g granulated sugar and 300ml water and bring to a boil.

WP_20131126_005[1]

Step 2

Bei mittlerer Hitze solange kochen lassen, bis der Zucker vollständig aufgelöst ist - Achtung, die Cranberrys platzen auf (Spritzgefahr!). Unter ständigem Rühren ca. 10-15min weiterköcheln.

Let simmer on medium heat, constantly stirring, until sugar is dissolved - careful, cranberries will pop open! Simmer for about 10-15mins.


WP_20131126_008[1]

Step 3

Die Masse in ein feines Sieb geben und vorsichtig durchstreichen, bis so viel Flüssigkeit wie möglich durchgelaufen ist (Cranberry-Reste können anderweitig verwendet werden, z.B. als Brotaufstrich).

Strain the cranberries through a fine sieve until as much as possible of the fluid has been removed. Keep solids for another use (e.g. bread spread).

WP_20131126_010[1]

Step 4

Den Saft einer Zitrone auspressen und unter den Sirup rühren. Danach vollständig abkühlen lassen und in Flaschen abfüllen (ergibt ca. 350-400ml).

Squeeze out the juice of one lemon and stir into the syrup. Let cool completely and fill into bottles (yields about 350-400ml of syrup).

WP_20131126_014[1]

Step 5

Etikettieren und verschenken oder einfach selbst genießen!

Add a pretty label and give away as a Christmas gift or enjoy yourself!